
Most RV awning repair jobs are smaller than they look: a gust that catches the fabric wrong, a branch brushed while parking, a summer of sun on the same fold line. Most of that damage is small enough to fix yourself in under an hour, for less than the cost of a campground night. Some of it isn't. Here's how to tell which is which, how to do the small-job repairs, and when RV awning repair stops being DIY and becomes a call to a professional.
Table of Contents
Why Does RV Awning Fabric Tear or Develop Pinholes?
UV exposure is the slow one. Vinyl and acrylic awning fabric both weaken over years of sun, and a fold line that gets creased the same way every time you roll the awning up is where that weakening shows first, as a crack or a pinhole rather than a tear.
The fast one is mechanical: wind catching an extended awning, a branch or a roof vent snagging it while you're pulling in or out, rain pooling on one side because the awning isn't angled to shed it, and stretching the fabric past what it's rated for. A scratch from a zipper on the storage bag, or from rubbing against the RV's own siding, is the third common cause, and it's usually cosmetic rather than something that needs a real repair. If you're not sure whether a manual or electric awning handles wind differently in the first place, that's worth reading before you assume every awning fails the same way.
Is This a Tape Job, a Patch Job, or a Replace-the-Fabric Job?
Lippert, which builds awnings for a large share of the RVs on the road, breaks its own repair guidance down by size, and it's a useful way to sort your own damage before you buy anything:
A scratch that hasn't gone through the fabric is cosmetic. A touch-up marker blends it in, and that's the whole job. A hole up to about 1/8 inch across is a liquid patch job. A rip, puncture, or seam separation smaller than about six inches is a tape or adhesive repair you can do yourself. Anything larger than six inches, or fabric that's cracking or splitting across a wide area rather than at one point, is a fabric replacement, not a repair. Patching it further just moves the failure point somewhere else on the same worn material.
How Do You Repair a Pinhole in RV Awning Fabric?
This is the simplest RV awning repair of the three. Clean the area and let it dry fully. Patches applied over dust or moisture don't bond. Apply a couple of drops of liquid vinyl patch directly into the hole from the top side. It self-levels into a waterproof seal as it cures, which typically takes a few hours. Check the specific product's label for its cure window rather than guessing. Leave the awning retracted, or at least undisturbed, until it's fully cured before you extend and retract it again.
How Do You Repair a Tear or Rip?
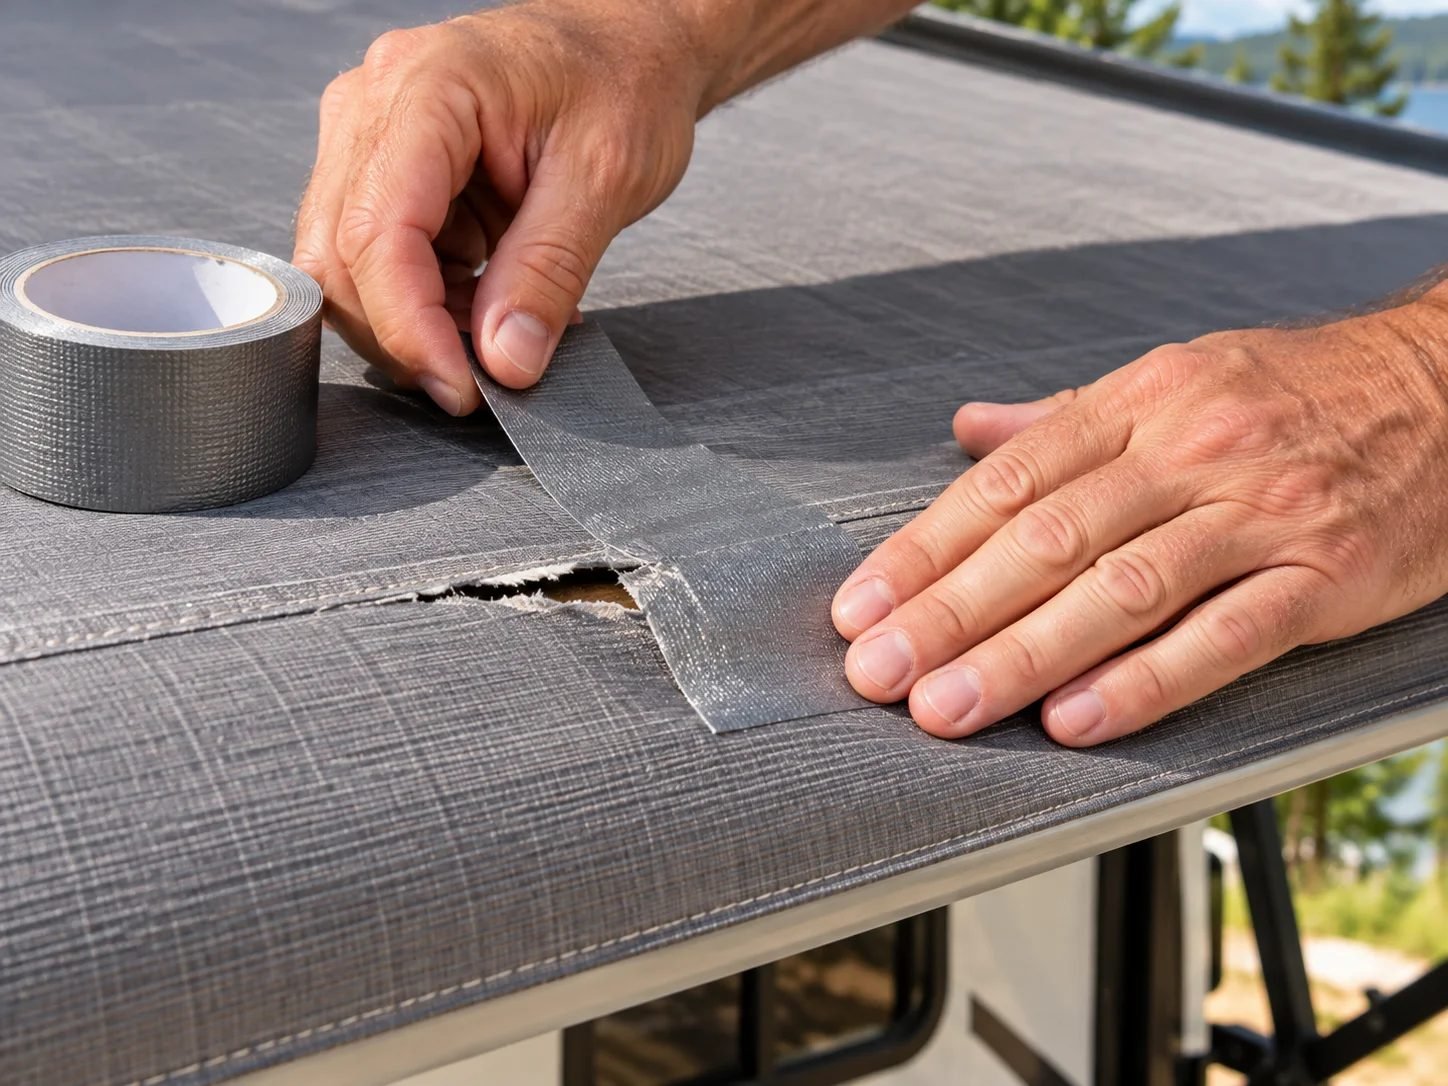
This RV awning repair is the one most people reach for. First, clean and dry the torn section. Bring the two edges of the tear back together as closely as they'd naturally sit, then apply repair tape to the top side, and a second piece to the underside, so the tear is sandwiched between two layers rather than patched from one side only. Press firmly outward from the center of the tear to push out any trapped air, on both sides.
You don't have to remove the whole awning if the damage is easy to reach with the awning extended. If it isn't (for example, a tear near the roller tube), removing the awning is a two-person job. It's heavier and more awkward than it looks, and one person at each end makes it manageable. Check your owner's manual or the awning manufacturer's instructions before you unbolt anything, since the mounting hardware differs between brands.
How Do You Repair a Separated Seam?
This third kind of RV awning repair takes more patience than the other two. Seams most often pull apart around the awning rail or roll tube, where the fabric flexes every time the awning opens and closes. Apply a bead of fabric adhesive along the seam, then clamp it closed. A standard clamp or a large binder clip both work, and leave it clamped for at least a few minutes to let the adhesive grab. Let it cure for a minimum of four hours, longer if the product label says so, before putting any tension on the seam again.
If the separation runs longer than about six inches, this is no longer a same-day DIY job. At that length, the fabric around the seam is usually also fatigued, and it's worth having it assessed for full replacement rather than re-gluing a seam that's likely to open again somewhere close by.
What You Need to Do These Repairs Yourself
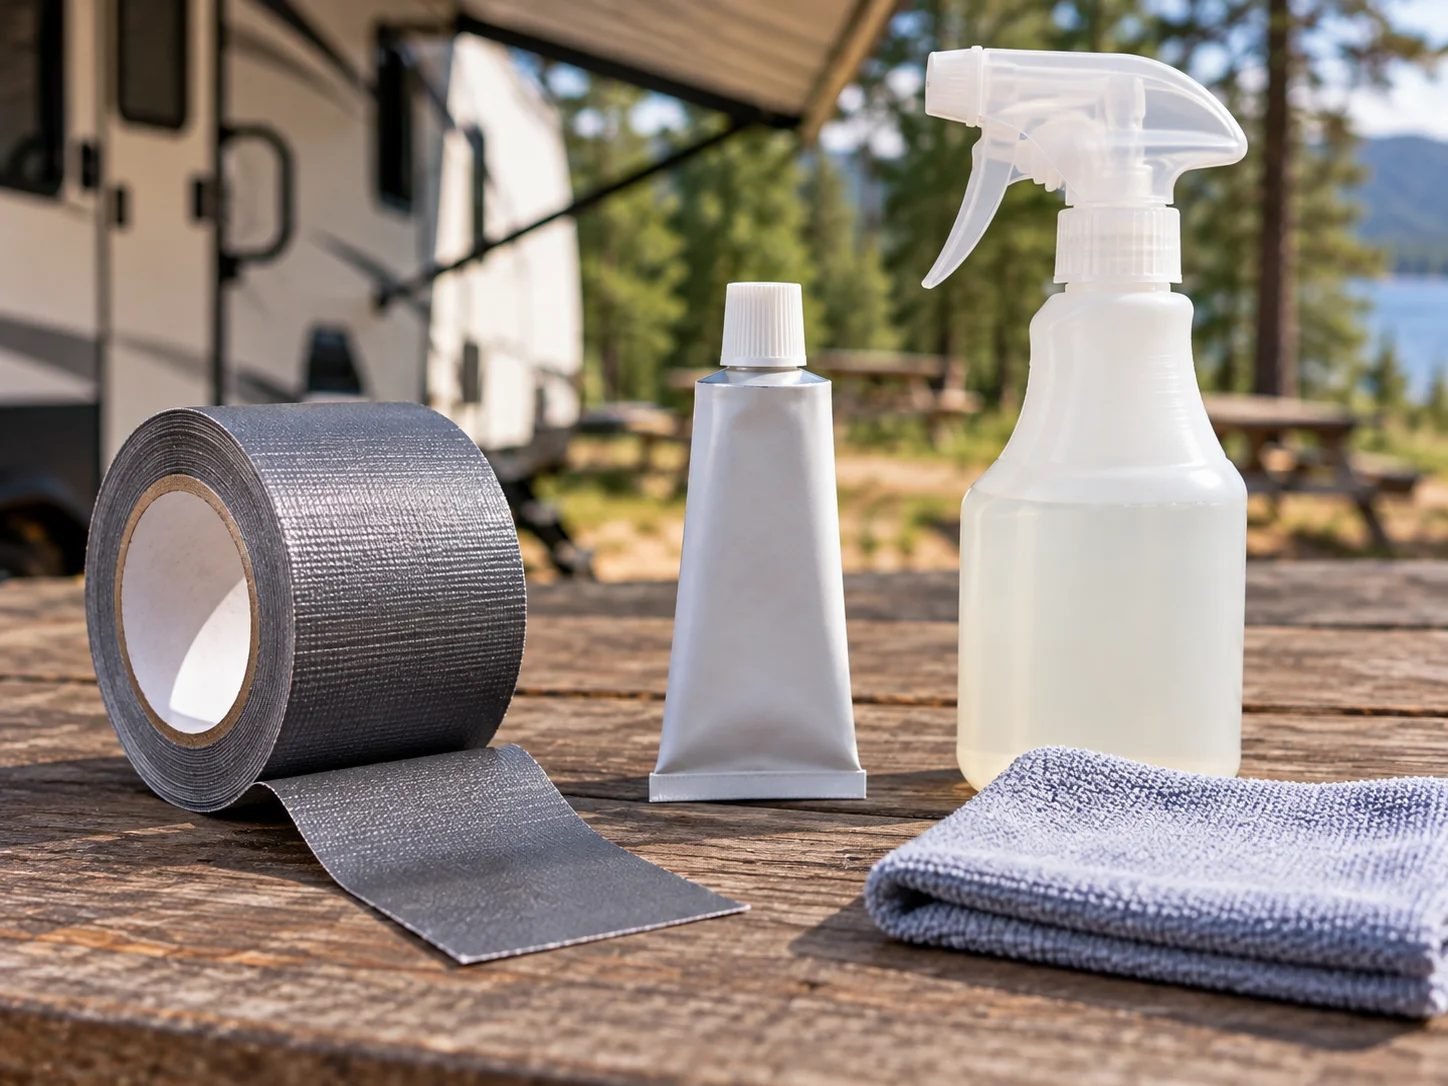
Three products for three kinds of RV awning repair, matching the jobs above. No one at Restful RV has used anything here, so what follows is about fitment, materials, and design rather than how it felt in the hand.
Camco 42623 Awning Repair Tape (5" x 15')
Best for tears and ripsThis is the one to reach for when a branch or a gust has punctured or split the fabric rather than just pinholed it. It's an adhesive-backed plastic film with UV inhibitors built in, so it isn't just a temporary patch. Camco sells it as a permanent repair, and it's the tape RVtravel's own awning-tear writeup independently landed on for the same job.
Clean and dry the fabric first. Bring the torn edges together, then apply a strip to the top side and a second strip to the underside so the tear is sandwiched from both faces, pressing out any air bubbles as you go.
What You'll Love
- Permanent, not a temporary patch, per Camco's own product description
- Sticks to vinyl and most other awning fabrics
- One roll covers several smaller tears, not just one
- UV inhibitors mean it isn't the first thing to fail in the sun
Worth Considering
- Needs a clean, dry surface to bond properly. Don't apply over dust or mildew
- Won't help a seam that's pulled apart at the stitching rather than torn through the fabric itself
- Air bubbles trapped under the tape will eventually work loose, so press it out fully the first time
Carefree 901033 Vinyl Liquid Patch
Best for pinholesMade by Carefree of Colorado, one of the two companies that build the awnings on most RVs, which is why this is the closer match to what Lippert's own repair guide describes for small punctures: a liquid patch dropped directly into the hole rather than a tape or fabric adhesive.
For anything up to about 1/8 inch across, a couple of drops into the hole from the top side creates a waterproof seal as it cures. It isn't built for tears or split seams. Those need the tape or adhesive approach instead.
What You'll Love
- From an actual awning manufacturer, not a generic tape brand
- Small pinholes are exactly the damage that turns into a bigger rip if it's ignored
- Doesn't require removing the awning from the RV
Worth Considering
- Only rated for small holes. Don't stretch it to cover an actual tear
- Stock on this one runs thin at some retailers, so check availability before you need it urgently
- Needs a full cure before the awning gets extended and retracted again
303 Fabric Guard, 32 oz
Best for preventing the next tearThis doesn't fix existing damage. It's what keeps a repaired (or still-healthy) awning from needing the tape and liquid patch again next season. It's the water repellent Sunbrella itself recommends for its own outdoor fabrics, which is also what one RVtravel reader pointed to in the comments on their awning-repair writeup.
Spray it on a clean, dry awning and let it dry fully before retracting. It restores water repellency and adds a stain-resistant layer without changing the fabric's color, feel or breathability.
What You'll Love
- The fabric manufacturer's own recommended protectant, not a generic sealant
- Safe on vinyl, acrylic and canvas awnings alike
- Doubles as protection for cushions, umbrellas and other outdoor fabric on the RV
Worth Considering
- Has to be reapplied periodically. It isn't a one-time fix
- Won't do anything for fabric that's already brittle or UV-damaged
- Needs a full dry-down window before the awning can be retracted
How Much Does Professional Awning Repair Cost?
The cost of professional RV awning repair varies by region and by what's broken. Most shops and mobile RV technicians bill by the hour, and the rate depends on your area and on whether they're diagnosing a mechanism problem (a stuck or misaligned arm) rather than just patching fabric. Get a quote before committing. A small tear that you could tape yourself for the cost of one roll of tape isn't worth a service call unless it's somewhere you can't reach.
Full fabric replacement is priced separately from a repair call, since it involves removing the old fabric from the roller tube and feeding new fabric through, and it climbs quickly with awning length. Get a specific quote for your awning's width rather than assuming a repair-call rate applies.
How Do You Prevent Awning Tears in the First Place?
Most of what shortens an awning's life is avoidable. A few habits, drawn from what RVers who've fixed a lot of tears now do differently, including the writer behind RVtravel's own awning-tear repair account:
Extend it only when you're using it, and keep it rolled up the rest of the time. UV exposure does the slow damage, and an awning that's out less sees less of it. Wash it at least twice a year and watch for mold or mildew between washes. Both weaken the fabric over time. Retract it in windy conditions rather than trusting it to hold. Even a modest gust can tear fabric that's already under tension.
Never retract it wet. Rolling up a damp awning traps moisture against the fabric and encourages mold, and working it while wet can stretch fibers that are already under load. Lower one end when rain is forecast so water doesn't pool and stretch the fabric, and secure it fully before towing.
Park some distance from low branches where you can, since falling debris is a common and avoidable cause of holes. Regular washing matters here too. See this site's guide to cleaning an RV awning for the actual method. Reapply a fabric guard like 303 periodically to keep the water-repellent layer intact, and inspect the fabric occasionally so you catch a pinhole and patch it before it becomes a six-inch tear.
How Long Does RV Awning Fabric Last?
As a general rule, awning fabric lasts between 5 and 15 years, depending heavily on material and climate. Vinyl fabric tends toward the shorter end of that range, roughly 5 to 8 years, while solution-dyed acrylic fabric (Sunbrella being the best-known brand) tends to run longer, closer to 10 to 15 years. An awning that's rarely extended and washed regularly will outlast one left out in full sun for months at a time, regardless of the material.
What Can You Fix Yourself, and What Needs a Professional?
DIY territory: pinholes, individual tears or rips under about six inches, seam separations under about six inches, and cosmetic scratches. All four are covered above, and none of them require removing the awning arms or touching the motor or mechanism.
Call a professional or plan on replacement for: seam separations or tears longer than about six inches, fabric that's brittle or cracking across a wide area rather than at one point, damage to the awning arms or roller tube itself, and anything involving a motor or electric awning mechanism, which is a different repair with different failure points, not a fabric problem.
Quick Answers
Can you repair an RV awning yourself?
Yes, for most awning damage. Pinholes, small tears, and short seam separations are all repairable with tape, a liquid patch, or fabric adhesive, with no special tools and usually under an hour. Damage longer than about six inches, or fabric that's brittle across a wide area, is where DIY stops making sense.
What is the best RV awning repair tape?
Camco's 42623 awning repair tape is a common pick for exactly this job. It's UV-rated, sold as a permanent (not temporary) fix, and it's the same tape one independent RV writer chose after asking other campers what has worked for them.
How much does it cost to fix an RV awning?
A DIY tape or patch repair costs only the price of the product, usually a single roll of repair tape or a patch kit. A professional repair call is billed at hourly labor rates that vary by area, and RV-specific mobile techs may price differently. Get a quote before you book one.
How long does RV awning fabric last?
Roughly 5 to 15 years as a general rule, with vinyl fabric toward the shorter end and solution-dyed acrylic toward the longer end. UV exposure and how often you leave the awning extended affect that more than age alone.
For more on keeping the roof and exterior in shape, see our other Roof and Exterior guides.