
A brown stain on the ceiling or a drip from a roof vent usually means water has been getting in for a while. Most RV roof leaks start in a handful of places, and you can fix them yourself with the right tape or sealant. The tricky part is that water runs along the roof deck before it shows up inside, so the stain is often not right under the hole.
Restful RV is a participant in the Amazon Services LLC Associates Program, an affiliate advertising program designed to provide a means for sites to earn advertising fees by advertising and linking to Amazon.com.
This RV roof repair guide covers how to find the leak, a leak finder you can run for your own RV, step-by-step fixes for seams and tears, the four supplies that handle most repairs, and the signs that mean a repair shop should take over.
Quick answer
Most RV roof repair comes down to three jobs: find where the water gets in, clean the spot, and seal it with a product made for your roof. Old lap sealant around vents, the air conditioner, skylights and the roof edges causes most leaks, and a fresh bead of lap sealant fixes it. A small tear or puncture gets a patch of roof repair tape such as EternaBond. If the roof feels soft when you press on it, the wood underneath is wet or rotting, and that is a job for an RV repair shop.
Roof safety first
- Check your owner's manual to see if your roof is built to walk on.
- Work only on a dry roof. A wet membrane can be very slippery.
- Stay off any spot that feels soft.
- Set the ladder on level ground and keep a helper nearby.
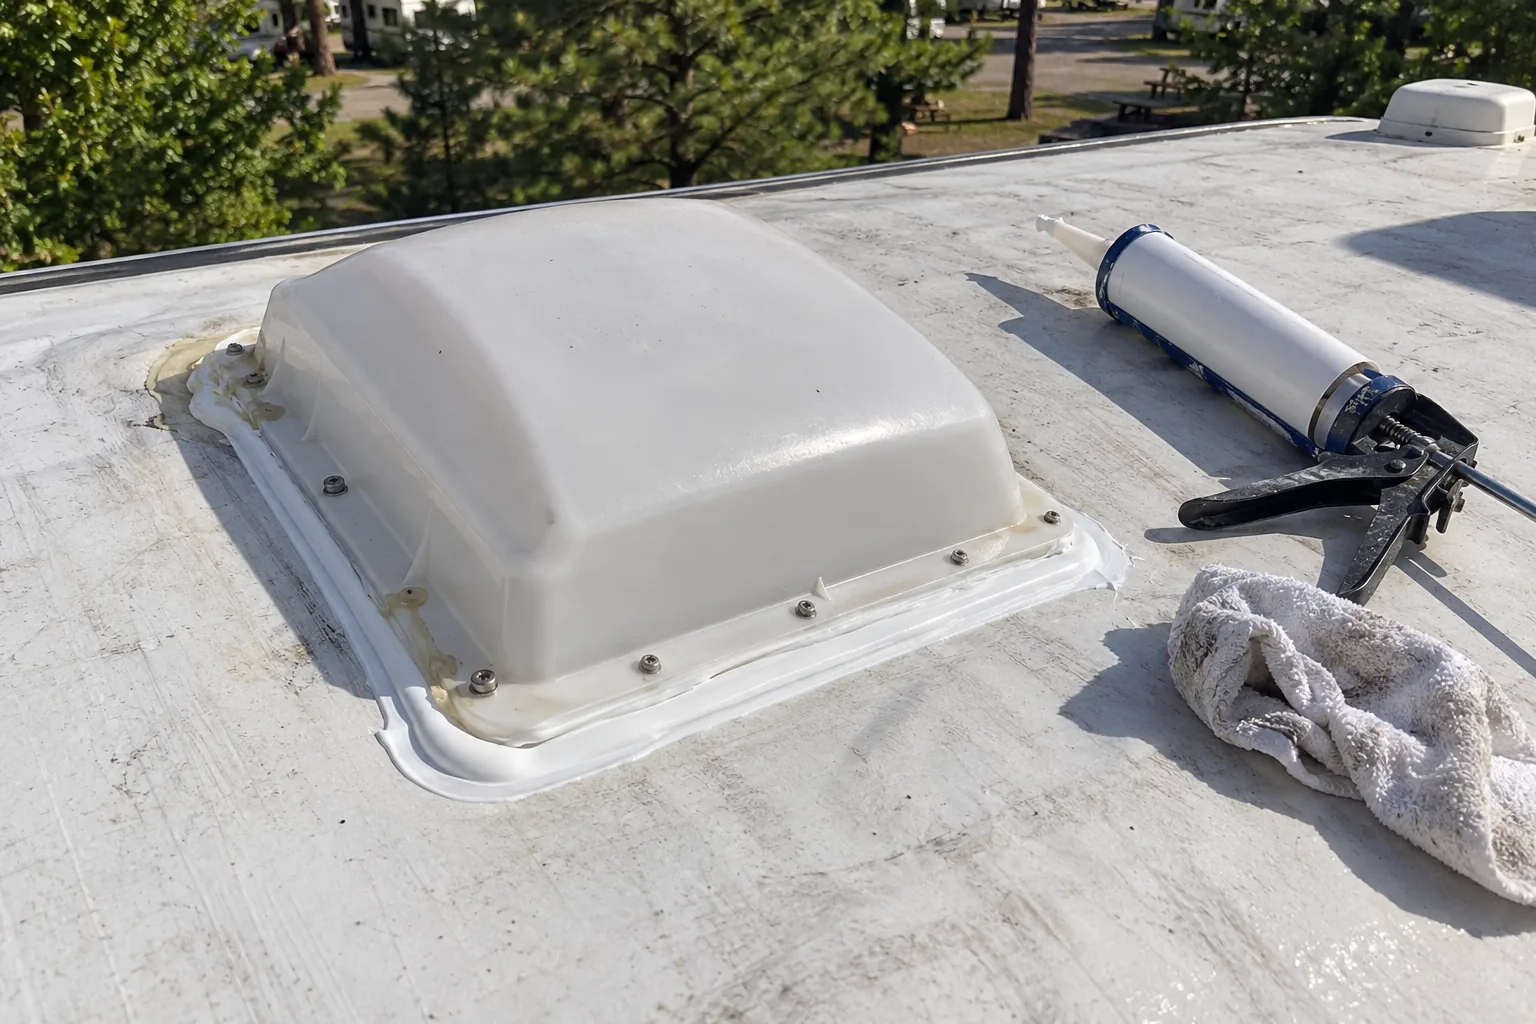
Table of Contents
How to Find an RV Roof Leak
Water rarely drips straight down from the hole. It runs along the roof deck, the rafters or the wiring until it reaches a low spot, so a stain over the dinette can come from a vent several feet away. Start with the clues inside, then go up top.
Signs of a leak inside the RV
- Stains, sagging or bubbled panels on the ceiling
- Soft or swollen wood around a vent, fan or the air conditioner
- A musty smell, especially inside cabinets on outside walls
- Wavy or bubbled wall panels near the top of a wall
- Water around a window frame after rain
Check the roof in this order
Most leaks start where something goes through the roof or where two surfaces meet. Work through these spots one at a time:
- The air conditioner and the gasket under it
- Roof vents, fans, and skylights
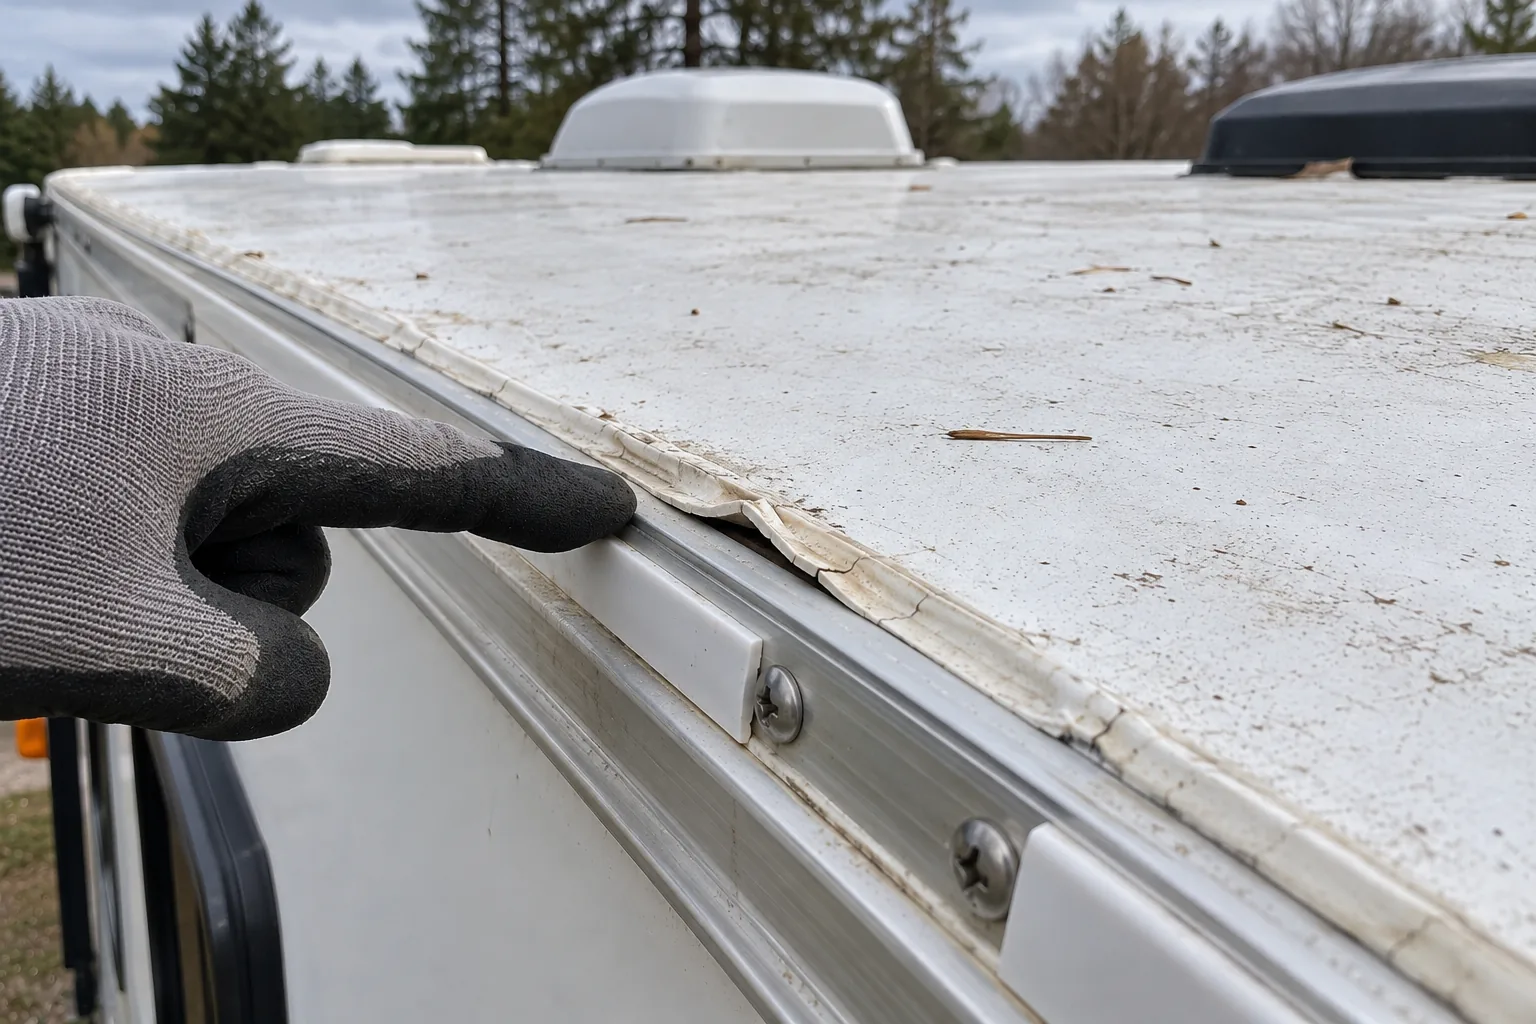
- The edges where the roof meets the side walls
- The seams where the roof meets the front and rear caps
- Antenna, ladder, solar panel and other mounts
At each one, look for sealant that is cracked, shrunken, or lifting at the edges, tears or punctures in the membrane, and screws that have backed out. Press gently around each fixture. If the roof gives or feels spongy, read the soft spots section before you seal anything.
Run a hose test
If nothing jumps out, a hose test helps. Pick a dry day, put a helper inside with a flashlight, and run a garden hose over one area at a time for several minutes. Start low on the roof and work upward, because water from higher up can run down and make you blame the wrong spot. Skip the pressure washer, which can force water into seams that hold up fine in rain.
If water shows up when it has not rained, the roof may not be the problem at all. A loose fitting or a cracked water line behind a wall can look like a roof leak. Our RV water leak detector guide covers how to catch plumbing leaks early.
Where is your RV roof leak coming from?
Pick where the water shows up and when you see it. The finder lists the most likely sources in the order to check them, and tells you whether it is usually a do it yourself job.
This is a starting point, not a diagnosis. Water can travel a long way inside a roof, so confirm the source with a close look or a hose test before you seal anything.
RV roof leak finder by Restful RVrestfulrv.com
What Kind of Roof Damage Are You Looking At?
Once you find the spot, match what you see to the right fix. The damage type decides whether this is a quick RV roof repair or a job for a shop.
| Damage | What you see | Usual fix | Who does it |
|---|---|---|---|
| Cracked or shrunken sealant | Hairline cracks, gaps or edges lifting off the roof | Clean it and add new lap sealant over the old bead | Do it yourself |
| Loose roof edge trim | Trim pulling away from the wall, screws backed out, the vinyl insert strip missing | Snug or replace the screws, refit the insert, and reseal along the top of the trim | Do it yourself if the wood under the trim is solid |
| Puncture or small hole | A clean hole from a branch, a tool, or an old screw | A pre-cut patch or a piece of repair tape | Do it yourself |
| Tear or long split | A cut or rip in the membrane | Repair tape that runs well past the tear on every side | Do it yourself if the wood under it is dry |
| Bubbles in the membrane | Raised areas that move when pressed | Find out why the membrane let go of the deck | RV repair shop |
| Soft spots | The roof flexes, dips or feels spongy | Cut out and replace the wet decking | RV repair shop |
| Worn-out membrane | Thin spots, many old patches, damage across the roof | Recoat or replace the membrane | RV repair shop for replacement |
How to Do an RV Roof Leak Repair at a Seam or Vent
Cracked sealant around vents, fixtures, and roof edges is the most common cause of a leak, and the easiest RV roof leak repair to do yourself. Dicor's care guide for rubber roofs says new lap sealant can go right over the old seal, as long as the new bead also touches the roof membrane and the fixture. That means you only remove sealant that is loose, not every bead.
- Pick a dry day and check the temperature range printed on the sealant tube.
- Wash the area with a roof cleaner, rinse it well, and let it dry.
- Scrape off any sealant that is loose, cracked through, or lifting, using a plastic putty knife so you do not cut the membrane.
- On a rubber (EPDM) roof, wipe the seam with a cloth dampened with mineral spirits and let it sit for at least 15 minutes, as Dicor's guide directs, without soaking the membrane. On a TPO or fiberglass roof, use the prep step printed on your sealant instead.
- Run a bead of self-leveling lap sealant over flat seams and around vent flanges, covering the old bead and touching the roof on both sides. Use non-sag sealant on vertical edges.
- Let it cure before rain. The tube lists the cure time for that product.
Skip silicone caulk on an RV roof. Most RV sealants will not bond to it, and its residue is hard to remove without harming the membrane, so it makes the next repair harder. Our roof sealant guide covers which sealant matches a rubber, TPO or fiberglass roof.
How to Repair an RV Roof Tear or Puncture
A branch strike or a dropped tool can open the membrane in seconds. If you catch it before water soaks the wood underneath, this RV roof repair usually takes nothing more than a tape patch.
- Press around the damage. If the roof feels soft, stop and read the soft spots section first.
- Clean the area with roof cleaner, rinse it, and let it dry fully. EternaBond also says to remove oil and grease, because the tape needs a clean, dry surface. Use the prep cleaner the tape maker lists, such as EternaBond's EternaClean, and do not let any solvent soak into the membrane.
- Trim any loose flaps of membrane so the tape lies flat.
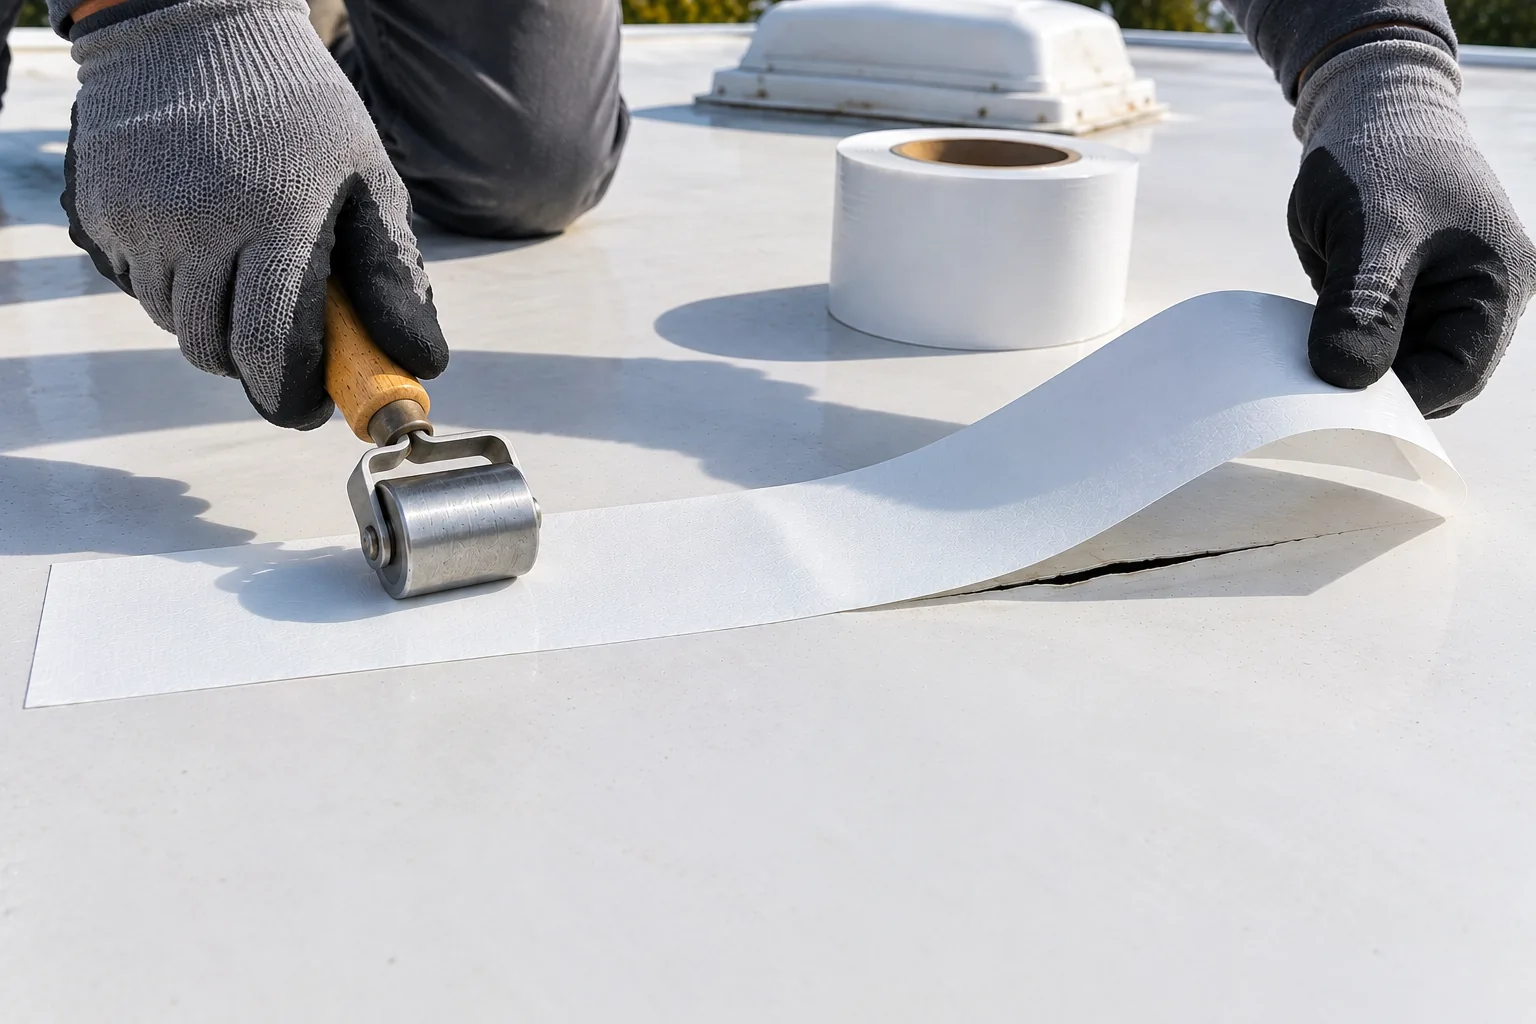
- Cut a piece of tape long enough to cover the damage and run well past it on every side, or use a pre-cut patch for a small hole.
- Peel the backing a little at a time and press the tape down from the center outward.
- Roll the whole patch firmly with a steel roller, paying extra attention to the edges.
EternaBond lists 40°F as the lowest air temperature for applying RoofSeal without its primer, so on a cold day EternaBond recommends EternaPrime first, or wait for warmer weather. On an older roof with several patches already, a long new tear is a good time to ask a shop whether recoating or a new membrane makes more sense.
What You Need for RV Roof Repair
Four supplies cover most small repairs: a tape for tears and seams, a pre-cut patch for single holes, a cleaner, and a roller to press tape down. You will also want a tube of lap sealant for cracked beads, which the seam section above walks through.
EternaBond RoofSeal White Tape, 4 Inch by 50 Feet
Best for tears and seamsEternaBond RoofSeal is a repair tape with a UV stable backing and a thick layer of what EternaBond calls MicroSealant. The maker says it bonds to EPDM, TPO, Hypalon, aluminum, galvanized steel, wood and fiberglass, which covers nearly every RV roof. It is the usual fix for a tear, a puncture or a seam that keeps opening up, and the listing says no extra sealing is needed over it.
The 4 inch width covers most tears with room to overlap solid roof on each side. EternaBond's instructions call for a clean, dry surface, an air temperature of 40°F or warmer, and firm pressure from your hand or a steel roller. Below 40°F, EternaBond recommends its EternaPrime primer first.
What You'll Love
- Bonds to rubber, TPO, metal and fiberglass roofs
- UV stable backing, no sealant needed on top
- One roll covers many repairs
Worth Considering
- Very hard to move once it touches, so line it up first
- Will not stick well to a dirty or damp roof
- More than you need for one cracked bead of sealant
Dicor Diseal Repair Patch, 6 by 6 Inch (522TPO-66-1C)
Best for small holesDicor's Diseal patch is a precut 6 by 6 inch square of repair tape. Dicor lists it for EPDM rubber, TPO, PVC, fiberglass, wood, plastic, steel and aluminum, so it works on both common RV roof membranes. It suits a single puncture from a branch or a dropped tool, an old screw hole you no longer need, or a short split.
Because it comes precut, you skip measuring and cutting tape while you are up on the roof. Clean the spot first, press the patch down from the center out, and roll the edges firmly. It is also a good piece to keep in the RV for a repair on the road.
What You'll Love
- Precut, so no cutting on the roof
- Made for both rubber and TPO roofs
- Small enough to keep in a road kit
Worth Considering
- Too small for long tears or open seams
- One patch per pack
- Stock was low when we checked
Dicor Rubber Roof Cleaner, 1 Gallon (RP-RC-1GL)
Best prep cleanerNo tape or sealant holds well on a dirty roof, so cleaning is the first step of every repair. Dicor's roof cleaner goes on as a spray, gets scrubbed in with a medium bristle brush, and rinses off. The listing says it is safe for regular use on all RV roofing and exteriors.
It doubles as your routine roof wash. Dicor's care guide for rubber roofs says to clean the roof at least four times a year, and it warns that cleaners with petroleum solvents, harsh abrasives or citrus ingredients can harm the membrane and may void your warranty. Using a cleaner made for RV roofs takes the guesswork out of that.
What You'll Love
- Made for RV roofs, no petroleum guesswork
- Same cleaner for repairs and routine washing
- Gallon size suits a full roof wash
Worth Considering
- Rinse well so residue does not streak the sides
- No brush included
- Oily spots may still need a solvent the tape maker approves
RecPro 2 Inch Steel Seam Roller
Best for pressing tapeRepair tape bonds through pressure, and EternaBond's instructions call for rubbing or rolling it down with a steel roller. A small seam roller presses the tape into the roof and pushes out air pockets that could let water creep under the edge.
RecPro's roller has a 2 inch steel wheel with a curved end, which RecPro says avoids leaving lines in the surface, and a wooden handle. RecPro lists it for EternaBond tape products.
What You'll Love
- Presses tape harder than your hand can
- Curved end avoids lines in the tape
- Small enough for a roof repair kit
Worth Considering
- Only needed for tape, not sealant
- A single purpose tool
- Press firmly, but do not gouge soft rubber
Swipe the table sideways to see every column.
| Supply | Best for | Works on | Size |
|---|---|---|---|
| EternaBond RoofSeal | Tears, seams, larger holes | EPDM, TPO, metal, fiberglass | 4 in by 50 ft |
| Dicor Diseal patch | Single punctures, screw holes | EPDM, TPO, fiberglass, metal | 6 by 6 in |
| Dicor roof cleaner | Cleaning before any repair | RV roofs and exteriors | 1 gallon |
| RecPro steel roller | Pressing tape down | Any tape repair | 2 in wheel |
For cracked sealant around vents and roof edges, you also need lap sealant: Dicor 501LSW self-leveling sealant for flat areas and Dicor 551LSW non-sag sealant for vertical edges. Our RV roof sealant guide explains which one your roof takes and which products can damage it.
Soft Spots and Rotted Roof Decking
Most rubber and TPO RV roofs are a thin membrane glued over thin wood decking, often lauan or plywood. When water gets under the membrane for weeks or months, the wood soaks it up and starts to rot. You feel it as a spot that flexes, dips, or feels spongy when you press on it. Sealant or tape on top will not fix it, because the wet wood underneath keeps rotting.
The fix is to cut back the membrane, remove the wet decking, replace it, and then patch or replace the membrane over it. That work happens near rafters, wiring, and the ceiling below, so an RV repair shop should do it. Bubbles in a rubber membrane can point to the same thing: they often mean the glue under the membrane has let go, sometimes because moisture got trapped under it.
Moisture inside the RV makes rot worse. If you store the RV with a slow leak you have not found yet, a dehumidifier for storage helps keep the inside dry while you track it down.
Fiberglass and Aluminum RV Roofs
Not every roof is rubber, but RV roof repair on other materials follows the same idea. Fiberglass and aluminum roofs leak mostly at the same places rubber roofs do: seams, fixtures, and screws. The sealant checks above apply to them too. EternaBond lists both fiberglass and aluminum among the surfaces its tape bonds to, so a tape patch also works for a puncture on these roofs.
Cracks in the fiberglass itself, or a dent in an aluminum roof that holds water, are different repairs. A fiberglass or RV body shop is the right call for those.
How to Make an Emergency RV Roof Repair on the Road
If a low branch tears the roof partway through a trip, a quick patch keeps the rain out until you can do a proper RV roof repair at home.
- Wipe the spot as clean and dry as you can.
- Cover it with a pre-cut patch or a strip of repair tape, pressed down hard from the center out.
- In heavy rain, tie a tarp over the area, but don't leave it on for long. A tarp that does not breathe traps moisture against the roof.
- Check the patch at your next stop, and redo it on a clean, dry roof when you get home.
It is worth keeping a small kit in the RV: a pre-cut patch, a few feet of repair tape, a rag, and a bottle of roof cleaner.
Repair, Recoat or Replace the Roof?
| Choice | When it fits | What it involves |
|---|---|---|
| Repair | A few cracked beads or a single tear on a roof that is otherwise solid and dry | Sealant, tape, or a patch, usually in an afternoon |
| Recoat | A membrane that is worn or has many small issues, over a dry, solid deck | A roof coating made for your membrane type, rolled over the whole roof |
| Replace | Soft spots in several places, a membrane pulling away, or damage across much of the roof | Removing the vents, AC and fixtures, new decking where needed, and a new membrane |
Not every problem needs a new roof, and most RV roof repair never gets past the first row of this table. Coatings are made for specific roof types, so match the coating to EPDM rubber or TPO. A full replacement means taking every fixture off the roof, which puts it in shop territory for most RVs.
Staying Safe on an RV Roof
- Before any RV roof repair, check your owner's manual. Not every RV roof is built to hold a person's weight, and the manual will tell you whether yours is.
- Work only on a dry roof. Dicor's care guide warns that a wet membrane can be extremely slippery.
- Stay off any part of the roof that feels soft, since the decking under it may be rotted.
- Stay away from the edges, set the ladder on level ground, and keep a helper nearby.
- If your roof is not walkable, do what you can from a ladder and leave the rest to a shop.
How Often Should You Check an RV Roof?
Dicor's care guide for rubber roofs calls for cleaning at least four times a year. Each wash is a good time to look at every bead of sealant and every fixture. Check again after hail, a hit from a low branch, or a long drive in heavy rain.
Regular checks keep most RV roof repairs small. Sealant does not wear out on a set schedule. Sun and heat crack some beads sooner than others, so touch up any spot that looks worn instead of waiting. Before the RV sits for the season, clean the roof, inspect it, and use a breathable cover. Our guides to RV covers for winter storage and winterizing an RV cover the rest of that list.
Quick Answers
Can I repair my RV roof myself?
Yes. RV roof repair is a do-it-yourself job for cracked sealant, small punctures, and tears where the wood underneath is still solid. Soft spots, rotted decking, and a full membrane replacement are jobs for an RV repair shop.
What is the best way to fix a leaking RV roof?
Find the source first, clean the area, then seal it. Use lap sealant for cracked seams and fixtures, and a repair tape such as EternaBond for tears and holes. Pick products made for your roof type.
How do I know if my RV roof is rubber or TPO?
Your owner's manual or the roof maker's label will say. A rubber (EPDM) roof often leaves a white, chalky residue on your hand. TPO is smoother and does not chalk the same way.
Should I use silicone on my RV roof?
No. Most RV sealants will not bond to silicone, and its residue is hard to remove without harming the membrane. Use a lap sealant made for RV roofs instead.
Why does my RV roof leak only when driving?
Wind pushes rain into spots that hold up fine when parked, mostly the seam between the roof and the front cap, front marker lights, and the tops of windows. Check those first.
How often should I reseal my RV roof?
Check the sealant every time you wash the roof; Dicor says at least four times a year. Reseal any bead that is cracked, shrunken, or lifting instead of waiting for a set date.
Where to Go Next
Once your RV roof repair is done, keep the supplies together for next time. For the sealant itself, start with our RV roof sealant guide. If the leak traced back to the air conditioner, our RV air conditioner guide covers the unit, and if you are replacing a vent fan anyway, our RV ceiling fan guide explains how ceiling fans and roof vent fans do different jobs.
Leaks that turned out to come from the side of the RV may lead you to our RV awning repair or RV slide-out repair guides. For everything else on the outside of the RV, browse the RV roof and exterior section.